Before we go in-depth on Website development know what a Website is?
Website Design step by step tutorial about how to build your website using your own domain names, hosting and WordPress & its components. A Website is a group of pages called Web pages with related content which are identified by a common name called Domain and published on a web server or web host.
Website Design step by step – If you want to improve your business and are planning to have a website then you’re in the right place to know about web design. In this blog, you will clearly understand how to design a website design step by step.

Before going further let’s try to understand Web Design.
Website Design step by step, Believe it or not, knowing how to make a website from scratch is one of the more essential skills you should master as a small business owner in this day and age.
- If you recognize a way to create your own website, you may save plenty of cash on web developers and designers.
- This will additionally enable you to follow the market trends and place new things on your website without having a programmer’s facilitation.
- You will effectively keep prior to your competition as a result, whereas they need their needs stalled by the necessity to consult developers, you may be able to build most things yourself (within reason, of course).
With that being aforesaid, the foremost necessary piece of the puzzle here is that you simply will learn the way to {create} a WordPress website and then create one thing awful for your business or project all on your own.
Website Design step by step, If you’d wish to find a WordPress website, here’s the full methodology step-by-step:
- Sign up for web hosting (we counsel Bluehost).
- Pick a domain|a site} name for your website.
- Install the free WordPress software system.
- Choose a WordPress theme.
- Create your initial page.
- Install a number of essential plugins.
- Don’t forget to promote.
When you’re able to sign in for a web hosting account, make certain you employ one of the Bluehost links on this page. Looking at them can end in 2 things:
(1) they’re affiliate links, which implies that we have a tendency to receive a tiny low commission if you get through them, and
(2) it’ll unlock a reduced worth with a free domain for you. You won’t get this discount if you visit the Bluehost website in the other method.
How to create a WordPress website – bird’s eye read
Here’s the set-up for what we’re planning to do in successive steps.
The necessary thing to note is that it’s all DIY-able (if that’s a word) we’re minimising the prices where attainable
- Why select WordPress as your website platform
- How to decide a reputation for your website, obtain a site & hosting
- Get accustomed to the WordPress UI
- Pick a subject matter/style for your website
- Get plugins to increase your website’s abilities
- Create basic pages
- Consider beginning a blog
- Adjust your website navigation
Step 1: Select WordPress as your website platform
Truth be told, there are several website platforms that you just will use once building a new site – Content Management Systems (CMS) are what they’re sometimes referred to as.
You can also learn WordPress designing by joining our digital marketing course.
The idea of a CMS is to offer you some easy-to-use tools so you’re able to edit your site’s content with no knowledge of coding. For the foremost half – from the user’s purpose of reading – those CMS look very similar to the acquainted interfaces at Facebook or Google Docs. You primarily produce new pages or documents, and so have them revealed online.
WordPress is employed on quite 43.3% of all websites (data says). Again, that’s all websites!
Or, to mention it otherwise, roughly every third website that you just visit is made on WordPress.
Here are the key details regarding WordPress:
- it’s open supply
- it’s free
- it’s the last word DIY answer for website building and online stores
- it’s additional versatile – will run any kind of website
- it’s fast, optimised, and secure
- it’s SEO-ready
- it makes promotion on social media easier
Now, one necessary distinction: the “WordPress” that we’re talking about here is “WordPress, the software system.” you’ll realise it if you head to WordPress.org.
There’s conjointly the opposite flavour of WordPress – “WordPress, the business service,” that you’ll realise if you move to WordPress.com. though, let’s simply keep in mind that what we wish is at WordPress.org, since it’s an additional versatile and cheaper-to-use version of the platform. this may all become clear within the next steps.
Action note. At this time, there’s no unjust task that you simply ought to do. Step one is simply regarding obtaining yourself aware of the tool that you’re getting to use to create your website within the next steps.
Step 2: Choose a name for your website, buy a domain & hosting (Website Design step by step)
When learning the way to build a website, selecting a reputation is perhaps the foremost fun facet of the total method.
After all, you have got complete freedom here. you’ll be able to choose virtually any name you would like for your website.
However! There is still some stuff you have to be compelled to perceive to line yourself up for achievement later down the road.
First off, there are nearly two billion (!) websites online (at the time of writing). This means, that staying original will be quite difficult.
It’s an extremely sensible plan to construct your website’s name (and so your domain name) around either the name of your organisation (the most evident approach) or a phrase that’s related to the niche you’re in, but with some more words for better brand-ability.
- In short, a good domain name ought to be:
- brandable – distinctive sounding, like nothing else that’s out there within the market
- easy to memorise
- short – those also are easier to memorise
- easy to sort and arduous to combine up – you don’t need individuals to be curious about the way to spell your site’s name
- including niche-related keywords – for example, if you are doing something with a pizza pie, it’d be cool to possess “pizza” somewhere within the name of the site; it works constantly in non-pizza industries moreover.
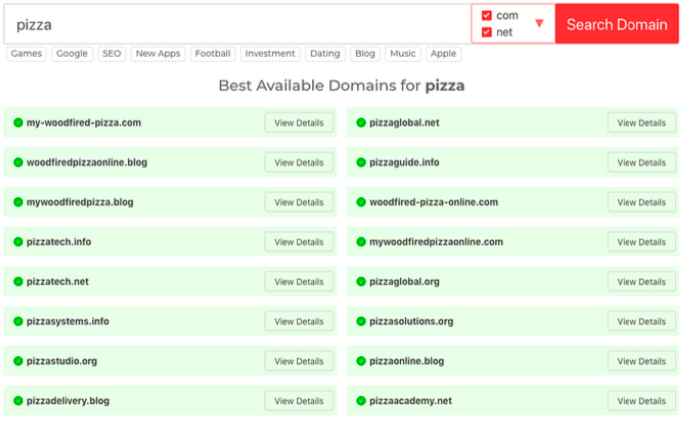
Here’s a fast tool you’ll be able to use to search out if the name you’re interested in is available:
If you have got no plan for that domain you wish to urge, then go straight to our no. one generator – Domain Wheel and see how it will assist you.
Start by inputting a seed keyword that defines your website well.
Domain Wheel can return with some suggestions. you’ll slender it down from there to seek out your excellent name.
The next step, once you recognize that name you wish, is to register it and additionally get a hosting package in one go. Let’s watch out of that next:
a) Purchasing your domain name and hosting.
Note. whereas things like buying a hosting package could sound intimidating ab initio, there’s terribly nothing to worry concerning. the strategy we’re presenting here is simplified and doesn’t want you to do any technical heavy lifting.
There are tens if not several utterly totally different corporations which are able to register a greenhorn name for you. Then, there are also countless companies which are able to sell you a hosting package.
But let’s not complicate things for ourselves and instead get everything from one company – and in one go.
We’re progressing to use Bluehost. Here’s why:
- Bluehost is also an honest internet host that’s optimised for WordPress and might certify that your site operates with no hiccups
- it’s one altogether the few corporations prompt on the official WordPress.org site
- it’s a low price
- it’s easy to use and beginner-friendly
- you get a website name at no price
Here’s what’s on the brink of happening now:
- We’re progressing to attend Bluehost and judge if a hosting got wind of our site.
- We’re progressing to register a custom name with Bluehost to boot (that is also a free domain name).
- We’re progressing to tell Bluehost to place in and tack a clean version of WordPress on our new hosting setup.
- We’ll embark on a 100% operational WordPress website!
Let’s begin – this could be the thanks to building a website:
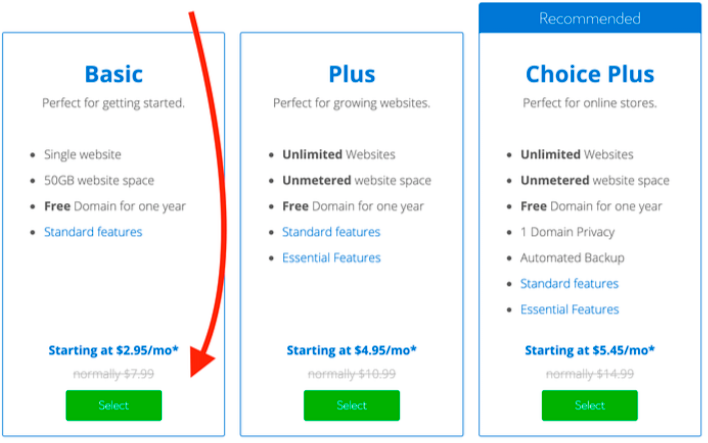
First, click here to travel to Bluehost. Then Click “Choose Plan” on the page
In most cases, if you’re launching a replacement website, the foremost cheap got wind of – called Basic – goes to be enough.
In the next step, Mention the domain name that you’ve determined to urge for your site:
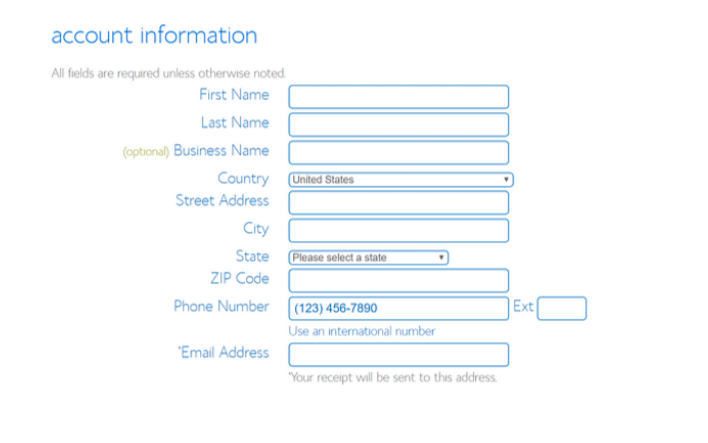
Next, Give your personal data:
Before continuing, it’s better to cross-check and assert the parameters of the hosting setup that you’ve updated. this may be found within the section labelled package information:
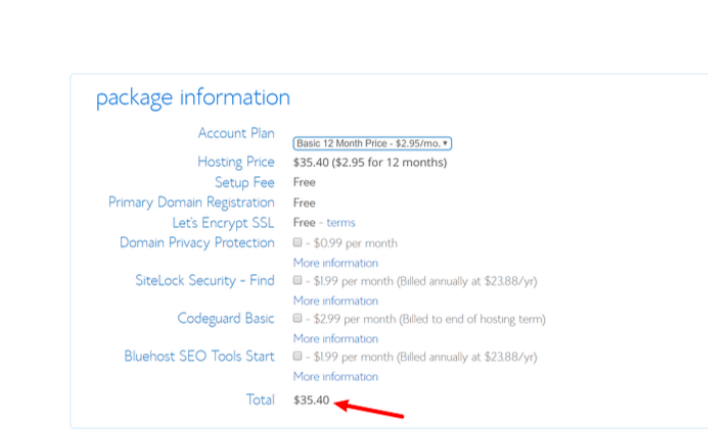
Note; you’ll get all-time low worth if you buy your hosting package for a minimum of twelve months.
At this stage, you’ll be able to click on “SUBMIT” and finalise your purchase.
b) Know Bluehost to install WordPress for you
Since you’ve signed up to Bluehost and have your hosting setup able to go, the sole component that’s missing is WordPress.
While you’ll technically install WordPress manually, why would you if you may get others to try to do it for you, and for free? Here’s how:
As presently as you completed the sign-up method with Bluehost, you must have received an associate email from the Bluehost crew with some details on a way to log into your client profile and start functioning on your website.
Once you’re logged in, Bluehost can show you an easy-to-use wizard that takes you through the method of putting WordPress on your hosting setup.
Alternatively, you’ll conjointly install WordPress by attending to the My web sites section and clicking on the Create Site button:

All that Bluehost desires so as to install WordPress for you is the name of your new website and therefore the username/password that you simply need to use once managing WordPress. Once you’ve completed the wizard, your website is put in and prepared to go!
Step 3: Understand more about the WordPress UI
You can log in to your WordPress user panel if you visit
www.YOURDOMAIN.com/wp-admin/
This is how it looks:
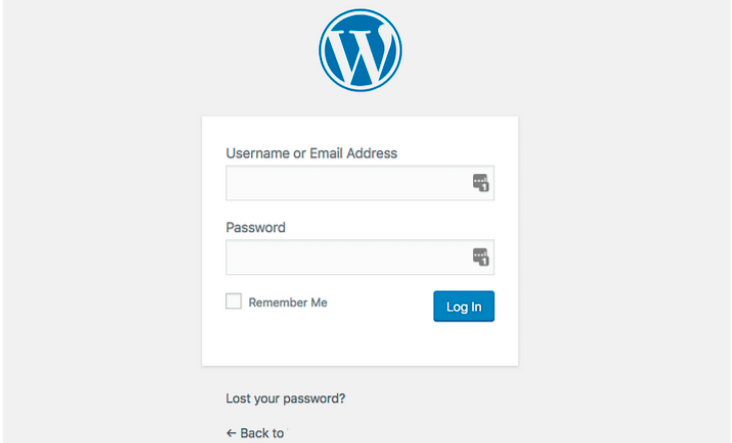
Use the access credentials that you’ve created on Bluehost within the previous step (the “WordPress install screenshot” above).
After work in with success, you’ll see the most WordPress interface altogether its glory:
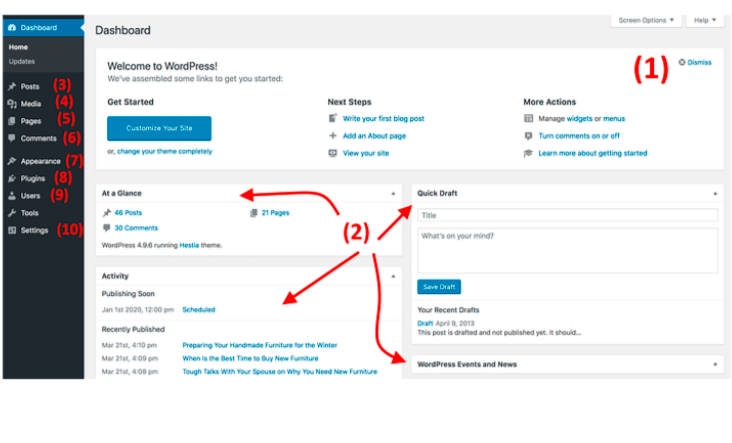
- Welcome message – some of the foremost vital area units of the admin panel are listed as fast shortcuts links – these are typically your shortcuts to the way to build a website.
- the present standing of your website and what’s occurring with it.
- Posts – go here to make blog posts.
- Media – upload/manage pictures and alternative media files here.
- Pages – go here to make sub-pages.
- Comments – This can be wherever you’ll be able to moderate comments.
- appearance – modification of your site’s style here and/or customise however bound things are displayed on this design.
- Plugins – install new plugins here.
- Users – manage user accounts which will access the admin panel of the website.
- Settings – the most settings.
At this stage, it’s smart to require care of some basic getting-started WordPress settings that may improve your expertise more down the road.
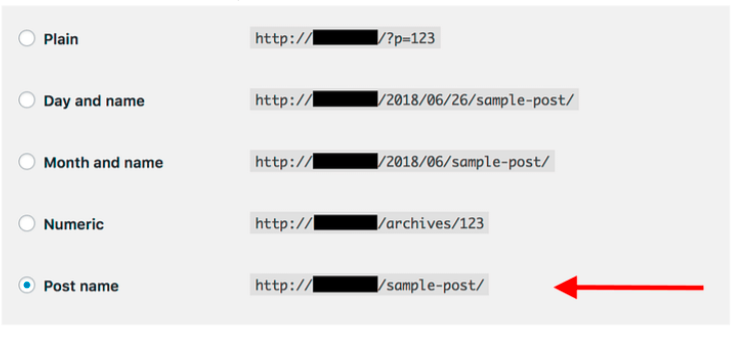
- a) Set permalinks
Permalinks define however the individual web page addresses – aka URLs – are structured inside your website.
The most optimised structure is to own the page’s title within the universal resource locator. As an example, your “about” page (more thereon page later on) ought to be accessible underneath one thing as easy as YOURSITE.com/about. Setting the permalinks properly can permit you to attain that.
To set your permalinks, visit Setting- Permalinks from the most sidebar in your WP dashboard.
Once there, choose this setting:
- b) creating your website public
I guess you wish Google to be able to notice and index your website. To make certain that’s the case, go to setting Reading, and ensure that the box labelled “Discourage search engines …” is unchecked.

- c) Set your web site title and tagline
Go to setting General and name the website Title and Tagline fields to what you have got decided.
Your web site title and tagline can seem in different places throughout the website. Some WordPress themes show those on the homepage and within the SEO description – that Google uses once listing your website on the results pages.
Also read: How to Create a Profitable Ecommerce Website
The tagline is non-mandatory – you’ll be able to leave it blank if you don’t have one for the website. However, it’s continually a part of the web design method, therefore it’s nice to return with your appropriate one.
.d) Disable and permit the Comments
Whether or not you would like to just accept comments on your website is up to you.
On the one hand, letting readers leave their opinions and queries below your articles/pages is nice for building a community around the website. But, on the opposite hand, you’ll even have your hands busy managing spam and ensuring that there’s no troll. It’s typically higher to depart the contact page because it is the primary channel of communication.
Whether you’ll find yourself permitting or disabling comments, it is done in Setting- Discussion.

- e) Deactivate pingbacks and trackbacks
I don’t apprehend why this setting is even still in WordPress. It’s principally a leftover from back in the day once pingbacks and trackbacks were an issue.

Though, if you wish to be told the way to create a website during this day and age, you’ll merely deactivate them by deselecting the following setting in Settings → Discussion.
- f) Set your time zone
Setting your time zone properly can create business new pages and posts additional predictable.
Generally, you would like to line the time zone to either wherever you’re at or wherever your audience is at. Whichever makes a lot of sense.
You can set the time zone in Settings → General.
With the essential settings out of the method, we are able to get to the fun stuff:
Step 4: Select a theme/design for your website
The great factor concerning WordPress is that it works with interchangeable designs – referred to as themes.
This means, that you’ll modify the manner of your WordPress website appearance with only one click.
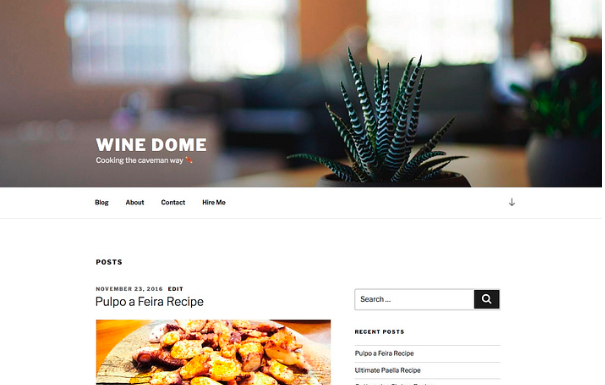
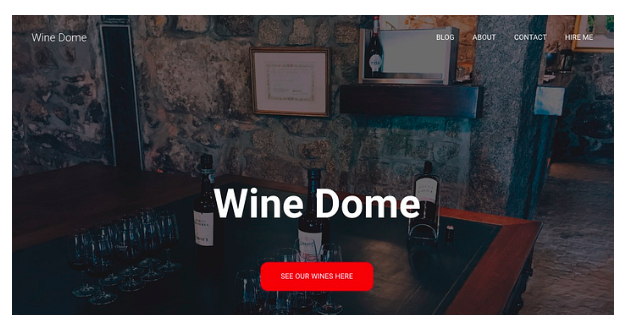
For example, this is often what a WordPress website appearance by default, right once the installation:
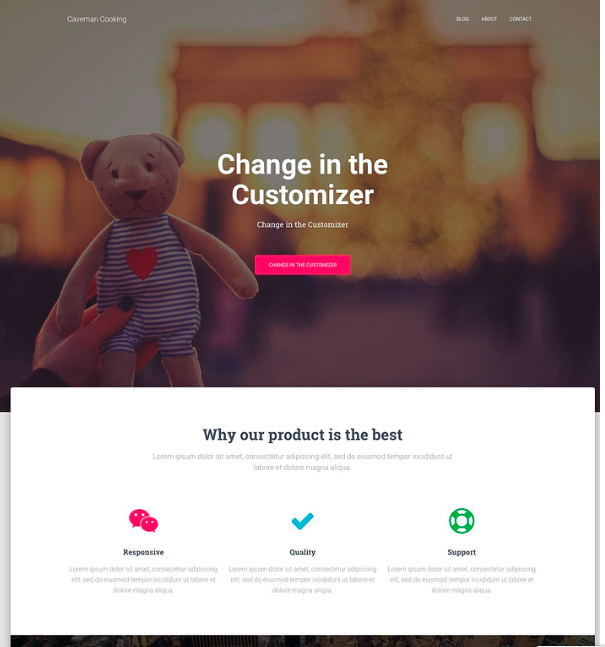
With simply one or two of clicks, and with a well-liked free theme known as Hestia, as an example, we are able to get onto to appear like this:
- a) choose a theme that you simply like
As I discussed, WordPress themes are out-of-the-box design packages that outline the method of your website’s appearance. you’ll install them quickly so modify them in the future if you would like to.
Your website design ought to be elite, supporting the aim of your site – merchandising high-quality products, marking your online presence as a blogger, transitioning your business online, putting in place a straightforward website, associate eCommerce store or eCommerce website, or for email marketing.
The crucial detail here is that themes don’t modify the contents of your website however only alter the presentation.
There’s a large abundance of WordPress themes out there. simply try the official directory at WordPress.org, there are many themes there.
Even though there is a myriad of paid themes out there, for many users, free themes are an excellent choice, to begin with. The shocking issue regarding a number of the simplest free
the theme is what number of spectacular options they convey to the table while not posing for something in return.
In this blog on Website Design step by step, We can try this, as a result, the theme you decide on these days doesn’t get to be your final decision. you’ll be able to invariably return to that afterwards and alter it in a very matter of minutes.
Therefore, we’re getting to choose a secure bet and use one of the foremost common free themes within the market these days to demonstrate how WordPress themes work. That theme is the same as Hestia.
Note. whereas we’ll use Hestia because the example within the following section, it’s not the only free theme that you just will use. Here’s a set of theme roundups for multiple functions, ranging from business websites to blogs, travel, food, personal sites, and more. you’ll be able to use any of these themes. The procedure is the same.
b) Install your theme
If the theme you’ve chosen is out there within the official directory at WordPress.org then the only factor you would like in order to put in it’s the theme’s name. Yep. That’s it.
Here’s how theme installation is done:
Then Go to the Appearance-Themes, from your WordPress dashboard then click on “Add New.”
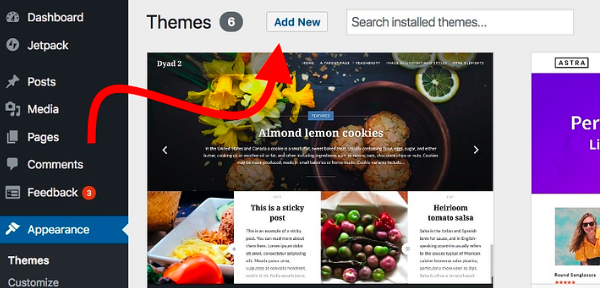
From there, input the name of the theme that you just wish to install, like so:
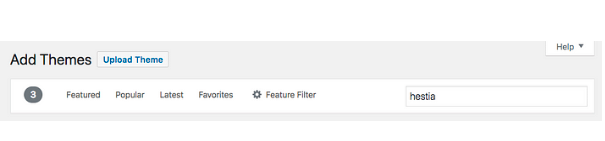
Website Design step by step, You will get to see the display on the list below the search field. simply click on the Install button below your required theme:
After a second, the theme is going to be installed. to totally change it on your website, click on the “Activate” button which will seem in situ of the “Install” button.
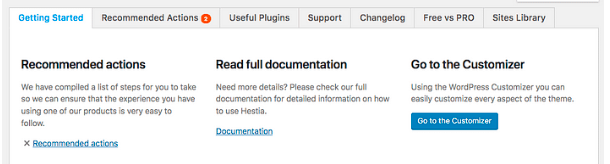
Hestia is every one of those themes that give some glorious onboarding for brand new users. to examine what the theme has future you, click on the button from the welcome prompt.

You’ll see your main Hestia panel, from which you can learn about the theme and extend its out-of-the-box features with some extras and integrations. Let’s do that now.
First, click on the “Recommended Actions” link to see what’s accessible.
Out of the alternatives projected there, let’s go together with only “Orbit Fox Companion” for now and click on the “Install and activate” button.
Note. Orbit Fox Companion could be a plugin. We’ll bring up WordPress plugins a lot later during this guide to building a website.
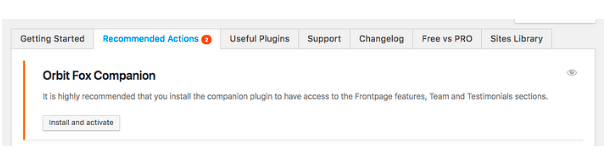
Orbit Fox is a nice addition to Hestia because it delivers some cool options to upgrade your site’s appearance. For example, you get some helpful new modules for the homepage, a template directory that may be useful once building your sub-pages (such as “about ” or “contact”), and custom menu icons.
At this stage, your new theme is active on your website. you’ll see it in action just by reaching YOURDOMAIN.com.
Though, what you’re seeing there’s off from the theme’s potential. Right now, we’ll watch out by adapting the design, menus, and alternative parts to create the website look specifically as you wish it. Here’s how:
- c) customise the theme
While the out-of-the-box look of your theme can be already quite nice, you must still do some basic customizations to create it to suit your wants hand-in-glove. In the beginning, it appears to involve a learning curve, however, it’s really intuitive, particularly over time.
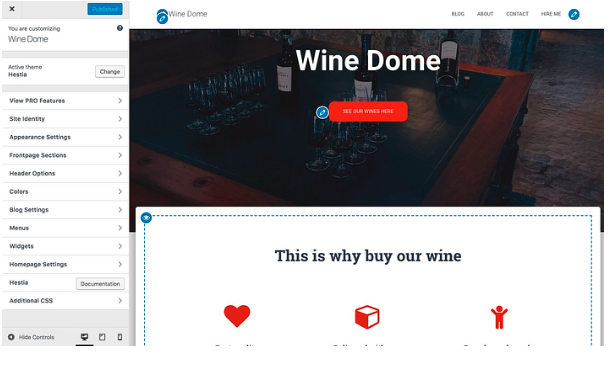
To begin, go to Appearance then Customise You’ll see the WordPress Customizer interface.
From there, you’ll be able to fine-tune a load of things. We’ll begin with the homepage since it’s the foremost representative.
Setting up your homepage.
Do the following:
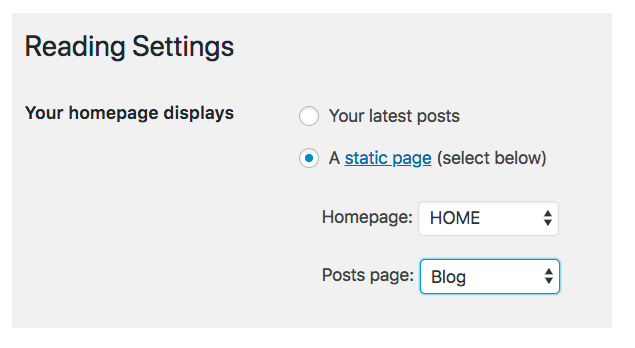
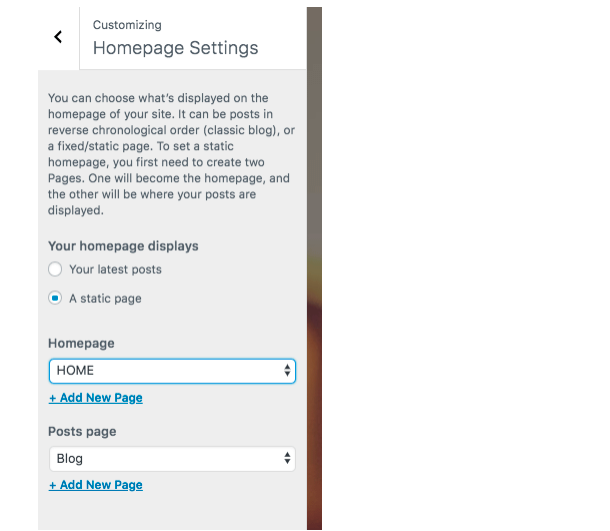
- In the sidebar, head to “Homepage Settings.”
- Select the option, “A static page” below your homepage display setting.
- Click on “Add New,” to make a brand new page to act as your homepage.
- Input the name for the page – “HOME” appears like a good plan – and click on “Add.”
- This will replace the default listing of your site’s most recent objects with a complete custom home page. Without fail you will see some cool objects on your new user-friendly home page. And these look good on both devices. For Beginners, On the page let’s change the headline. It’s also a good idea to mention the name of your business and anything else that suits your complete website. To make any changes to the page, Next to the headline click on the pencil icon.
- When you do, therefore, a customization panel can seem on the left.
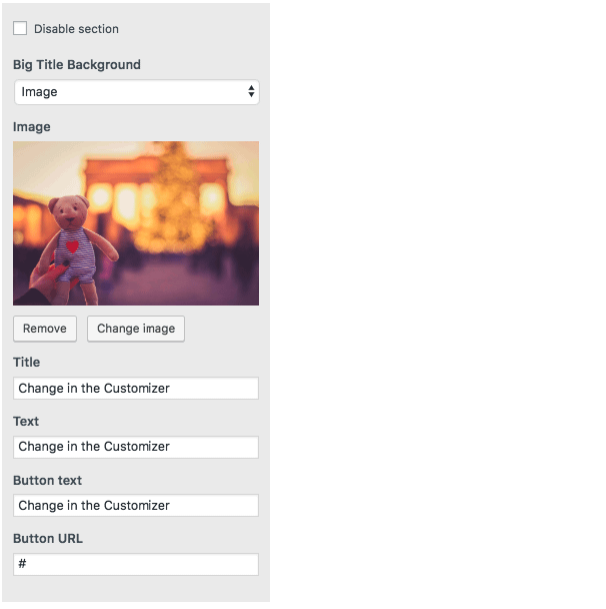
- Through it, you can:
- change the background image – create one thing associated with your business
- change the title
- change the text below the title – you’ll be able to take away this fully if you wish to
- change the button text – sometimes resulting in your product or most important pages (more on it in a minute)
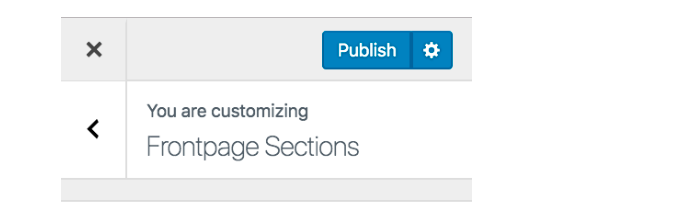
Underneath that, you get to regulate any of the opposite accessible homepage blocks. It works equally to the mechanisms offered by popular website builders (like Wix, Squarespace, or Weebly). By default, you get all of those (see this list by progressing to “Frontpage Sections” from the Customizer sidebar):
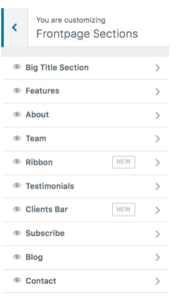
- The options section may be a great spot to clarify what your company should provide or what the aim of the website is – that “purpose” is maybe the no. one issue to stay in mind as you find out how to create a website.
- The regarding section could be an excellent spot to speak regarding your story.
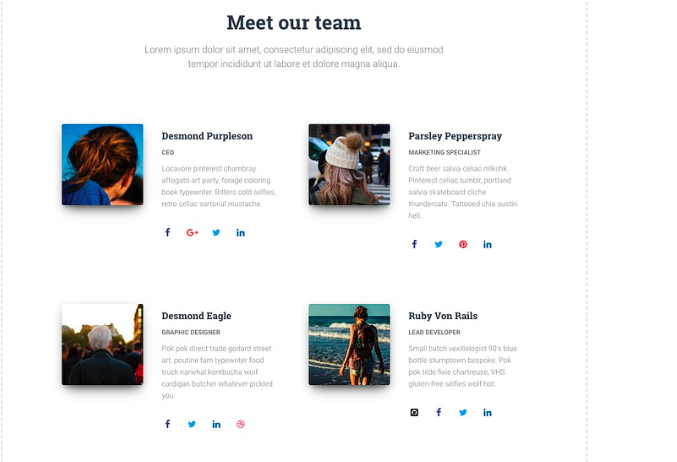
- The Team section you’ll be able to use if additional individuals add your business and you’d wish to highlight them.
- The Ribbon is another place wherever you’ll be able to mention your primary call to action.
- The Testimonials section is amazing once you need to showcase what your previous customers had to mention regarding your business.
- The Contact section is wherever you’ll show your contact info and let individuals knowledge to best reach you.
There are some additional sections accessible. It’s best to flick through those and choose those that add up to use for your business and in your specific state of affairs.
When you’re done adjusting the homepage, Don’t forget to click on the “Publish” button which is on the top.
Adjusting the typography.
The next step to try and do would be to require care of your site’s typography – the fonts used throughout the website.
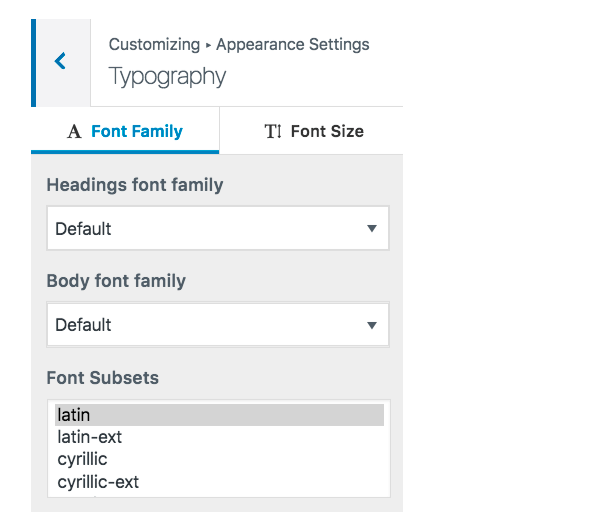
You can do this in Appearance- Settings → Typography from the WordPress Customizer sidebar. There, you’ll be ready to decide on a font and see it on your website instantly.
Colours.
Out of the box, your new theme goes to use a few primary colours that outline its default colour scheme. you’ll be able to modify that setting within the WordPress Customizer. simply click on colours within the main sidebar.
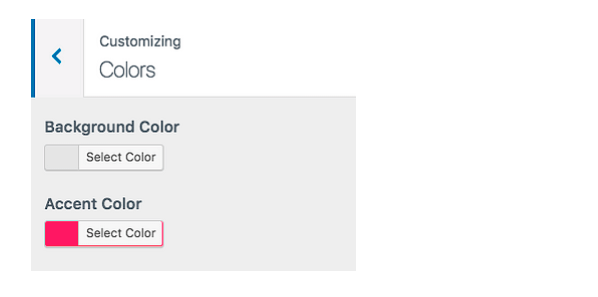
The Accent Colour is typically the colour used for buttons, links, and everything else that’s meant to square out from the remainder of the site’s style.
After doing the on top, your website can begin feeling like it’s really yours. you may have created all the required tune-ups and customizations to form it to match together with your whole.
Note. There are square measures and more settings within the WordPress Customizer to experiment with. Most of them are square measures designed to extend the user expertise of your website. as an example, you can:
- pick the default layout in line with your website desires – whether or not you wish the sidebar to air the left, right, or nowhere,
- how you wish the diary listing to be displayed,
- whether you wish for a main background image for the whole website,
- the shape of the buttons, and much additional.
Step 5: Get plugins to increase your website’s performance
In different words, they extend the quality and practicality of your website by adding some much-needed options. Basically, as you’re working out the way to build a website on your own, plugins are, however you’ll be able to get some nice options while not knowing any coding.
Here are the plugins you must take into account obtaining – better of all, they’re all free:
- Yoast SEO – helps {you build|you create} search engine optimisation tweaks and make your website additional accessible to the search engines generally.
- Google Analytics for WordPress – this one integrates your website with the foremost common traffic analysis resolution on the web.
- Wordfence Security – improves the safety of your WordPress website.
- UpdraftPlus – will automatically back up your website.
- Optimise – optimise your pictures.
- WPForms – allows you to add interactive contact forms to your website, that your visitors will use to succeed in you directly – far better than displaying your email in plain text on your website.
- Also, look around this list of the foremost common WordPress plugins of all time. you may notice one thing: attention-grabbing there further.
Installing plugins is easy. If it’s a free plugin that we’re managing, then all you would like is the plugin’s name.
Go to your WordPress dashboard to Plugins → Add New. From there, input the name of the plugin that you simply need into the search field, so click on “Install” and “Activate.”
Step 6: Create basic pages
There are a few pages that all websites should have, regardless of their purpose or goal.
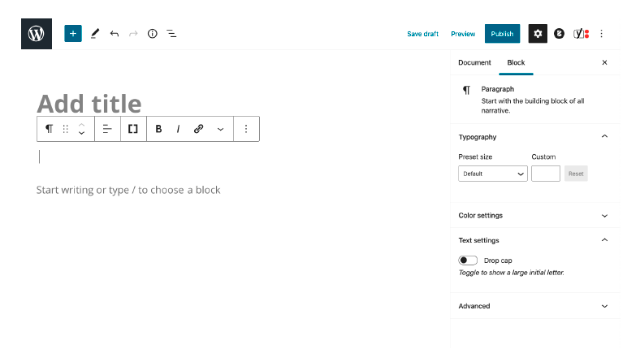
Before that first know how to even create a page in the first place:
To do that, Just go to your WordPress Dashboard-Pages-Add New you will get the below screen:
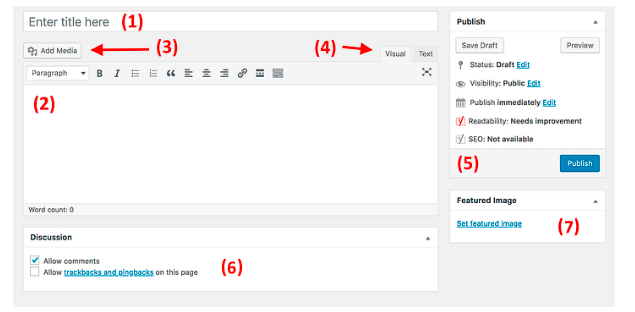
- Make a Place for the headline of the page.
- The body section – The important content of the page. The interface is extremely like MS Word. You get all the fundamental text information options (like bold, italics, positioning text to left/right/centre, making lists, etc.).
- you’ll add pictures by clicking this button.
- Switch between the Text and Visual editors. Use the previous as long as you’re a minimum of mistily aware of HTML code.
- The Publish section. This is often wherever the main Publish button is.
- Discussion. Decide whether or not or not you would like to permit comments. The “trackbacks and pingbacks” setting you’ll leave ungoverned.
- Featured image. Most WordPress themes take that featured image and show it somewhere in an exceedingly distinguished spot aboard your page.
When you’re done writing the page’s content, click on “Publish.”
Now, with the how-to out of the method, here are the pages you must think about creating:
About – I’ve mentioned this one or two times recently since it’s an extremely very important one. Your regarding page is wherever you get to inform the story of what your website is and why individuals should pay attention. This one page is essentially a must-have for everybody who needs to find out a way to create a website.
Contact – this is often wherever you’ll show some contact information together with a pleasant contact form, through which individuals will reach you directly (you will get such a kind via the aforesaid WPForms plugin).
Privacy Policy – This page has become a massively necessary part of today’s website.
Portfolio – an area for you to showcase your past work.
Store – an important thing if you wish to sell something from your eCommerce website. to create this work, you furthermore may like a preferred WooCommerce plugin – the most effective e-commerce answer for WordPress.
FAQs – if the scope of your new website needs some further info for potential users.
Once you’re finished with those, you’ll additionally inspect this list of some valuable pages worth having on your website. you’ll treat it as a beginner’s guide to the must-have website parts.
Step 7: think about starting a blog (Website Design step by step)
A blog (as well as promoting through content – aka “content marketing” in general) is among the foremost effective ways in which to market not solely your website but additionally any product that you simply may need to sell through that website.
And it’s not simply me saying this; there’s information proving that blogs are a superior tool for promoting online, with 55% of marketers expressing that blogging is their prime inward promoting priority.
Website Design step by step
Also read:
Running a blog may be an easy idea. What you are doing is publish articles associated with the topic of your website and do it frequently.
From a technical point of view, WordPress has a blogging tool built straight away. Actually, you can start blogging on the WordPress platform.
To Post a new blog, you just need to go to Posts-Add New in your WordPress dashboard.
The process itself to create a new blog post works more are less the same as creating a new page. The editing and options are mostly the same as the page creation. Below screenshot for your reference.
The difference is that you can assign your posts to tags and categories.
Below is what a new blog post looks like.
After you’ve worked on a blog post, click on “Publish.”
To make your posts merely accessible, you need to designate one on each of your pages to operate the foremost blog listing for the posts.
- To do it, first, go to Pages- Add New and build a blank page and name it “BLOG” and simply create things clear.
- After that go to settings- Reading, and choose your newly created blog page as the “Posts page” like so:
At this stage, you’ll be able to navigate to its new page and see all of your recent blog posts there. If you’re reaching to create plenty of content for your blog, think about an SSL certificate, in order that your readers feel safe whereas browsing through it.
Of course, the powerful half concerning beginning a blog is writing blog posts frequently and creating them engaging for individuals to browse.
Step 8: modify your website navigation
With all of your key pages online (and maybe your web blog started as well), it’s currently the perfect moment to regulate your site’s navigation and create it overall easier to consume for the guests.
We’ll specialise in 2 parts here:
a) Menus
Menus are the first part through which a visitor navigates your site. so they’re crucial when deciding a way to create a website.
Depending on your theme, you may have a few choices to decide on relating to menu settings. Here’s what you’ll be able to sometimes do (on Hestia’s example):
Create a Mean First go to Appearance → Menus in your WordPress dashboard.
You’ll see the below screenshot for your reference:
On the left, you will see all the pages you can choose to add to a menu and on the right, you can also see the menu structure and mean settings.
Let’s begin selecting the main important pages and add them to the menu. First, select About Contact and other pages you consider to be important for your website and add them to the menu.
You can drag and drop the menu items to reorder them in the menu setting.
When you’re done, choose the menu located at the bottom. Usually, choosing the location named “Primary Menu” can lead to showing the menu within the prime section of the website. this is often most likely what you wish for your main menu. Click on “Save Menu” to save the settings.
Note. you’ll be able to produce further menus still. simply click on the “create a brand new menu” link that’s visible within the screenshot on top of it. This may show you a similar menu creation panel. every menu has to be displayed in a very completely different location. So, for this new one, you’ll be able to assign it as the “Footer Menu.”
Now you can see the menu in the place on your website. As below screenshot.
b) Widgets
Widgets are the oldest feature in WordPress. In simple words, a widget is a small block of content that can be placed in various places across the website.
The normal placement of widgets is the footer or sidebar of the website. To create widgets go to the Appearance widgets in your WordPress dashboard and you can see How widgets look on your website.

To add any widget to a widget space, simply grab it from the left-hand aspect and drag and drop it onto your chosen widget space on the right.
After you’re through with your widgets and navigation, your website is essentially prepared for the world to see!
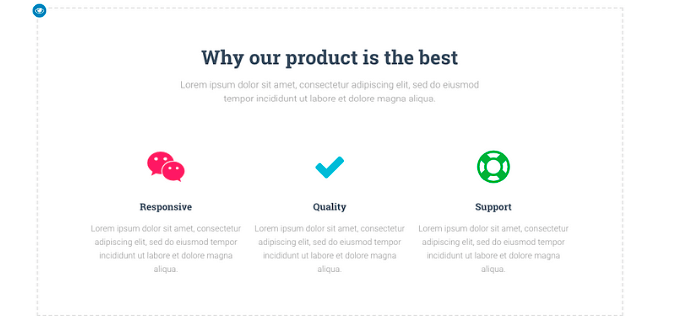
Responsive Web Design
Responsive web design (RWD) may be a web development approach that makes dynamic changes to the looks of a website.
depending on the screen size and orientation of the device getting used to looking at it.
In responsive design, page components reshuffle as the viewport grows or shrinks
Website Design step by step – What are responsive pages ?
In this section of Website Design step by step, we will understand what is a responsive website. Responsive web design, conjointly known as RWD design, describes a contemporary web design approach that enables websites and pages to render (or display) on all devices and screen sizes by mechanically adapting to the screen, whether or not it is a desktop, laptop, tablet, or smartphone
- a responsive design approach? How do responsive websites work? Is responsive web design necessary?
Responsive design could be a graphic user interface (GUI) design approach accustomed to producing content that adjusts swimmingly to varied screen sizes.
Designers size components in relative units (%) and apply media queries, thus their designs will mechanically adapt to the browser space to confirm content consistency across devices.
Responsive sites are designed to figure on any size screen and device, from the largest desktops to the tiniest smartphones.
Instead of making completely different|completely different} layouts to suit different sizes and resolutions, responsive sites check the dimensions of the device and change themselves mechanically to suit.
Related Article: 10 Ways Website Design can Enhance Your Business
Responsive design will assist you to solve a lot of issues for your website.
It will build your website mobile-friendly, improve the means it’s on devices with each massive and little screen, and increase the quantity of your time that guests pay on your website.
Website Design step by step – How to create a Responsive Website?
- Set acceptable Responsive Breakpoints.
- Start with a Fluid Grid.
- Take touchscreens into thought.
- Use Responsive pictures and Videos.
- Define Typography.
- Use a pre-designed theme or layout to save lots of time.
- Test Responsiveness on Real Devices.
Google prefer responsive websites
Website Design step by step
Google has aforesaid that it ranks sites optimised for mobile higher in mobile searches.
Google recommends responsive web design, which means your responsive designed website} can rank furthermore on mobile search as a site designed specifically for mobile.
Conclusion: Hope this Website Design step by step tutorial was really helpful, now it is your time to build a WordPress website for your business, Good web design helps guide your users’ eyes and tell them wherever you wish them to appear.
On your website, your design will draw attention to special offers, highlight calls to action, and facilitate users to establish buttons and clickable components. These things will facilitate drive users to require the actions you would like.